REVIEW · SYDNEY
Sydney Photography Masterclass – Private Photography Lesson
Book on Viator →Operated by Aperture Tours · Bookable on Viator
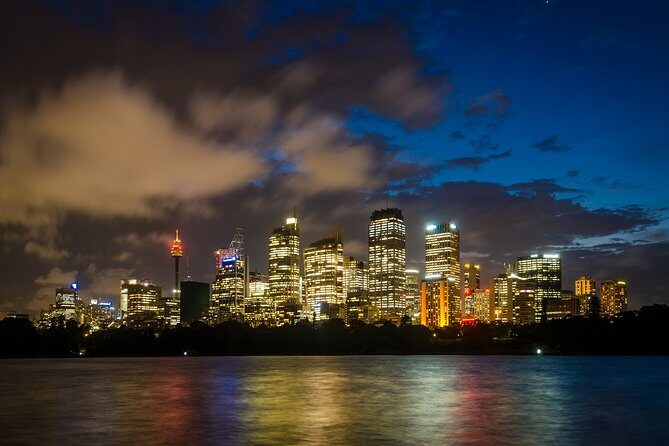
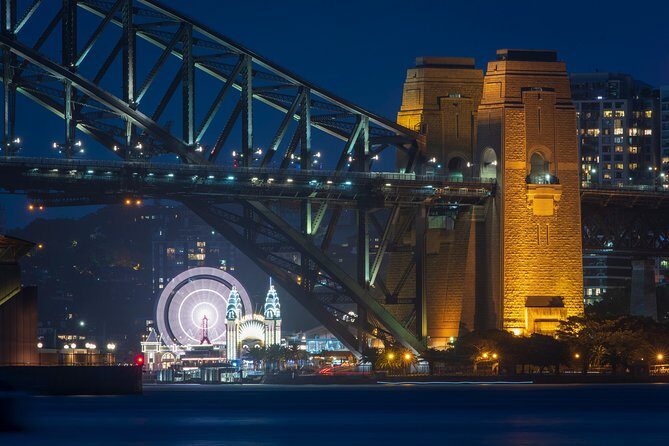
Three hours, and your camera starts behaving. This private Sydney session mixes iconic harbour views with hands-on coaching so you can actually improve, not just snap photos. You’ll work through night photography challenges in real locations, from Milsons Point and Luna Park to the Opera House and the Rocks.
Two things I really like: the way the lesson tackles the exposure triangle with practical tradeoffs, and the fact that coaching is aimed at your level. Even if two people in the group have different experience, you still get useful direction. One thing to consider: you must bring a camera (and think about whether you want to rent a tripod), because the learning is built around using what you’ve got in front of you.
In This Review
- Key highlights you’ll feel in your photos
- Where the Lesson Begins in Kirribilli (41 Broughton St)
- Milsons Point to Luna Park: Training Your Eye Before the Night Wins
- The Harbour Bridge and Hickson Road Reserve: Getting Exposure to Behave
- Sydney Opera House: Night Settings and Focus in the Real World
- Cahill Expressway to Mrs Macquarie’s Chair: Timing the Twinkle
- The Rocks Backstreets to Circular Quay: Turning Details into Strong Images
- What You Learn (and Why It Cuts Through Guesswork)
- Price and Value: Is $186.48 a Good Deal?
- Practical Prep: Camera, Tripod, and Comfort at Night
- Who This Photo Masterclass Fits Best
- Should You Book It?
- FAQ
- How long is the Sydney Photography Masterclass?
- Is this a private lesson?
- What’s included in the price?
- Do I need to bring my own camera or can I rent one?
- Where do we meet for the lesson?
- Can I cancel and get a refund?
Key highlights you’ll feel in your photos
- Private group size (up to four people) means more direct help, less waiting around
- Exposure triangle taught with real-world examples so settings make sense fast
- Night shooting tips focused on settings and timing for Harbour Bridge and Opera House views
- Composition coaching at multiple vantage points from Luna Park to Mrs Macquarie’s Chair
- Photo review at the end to help you correct what matters most
- Iconic stops plus backstreet textures in The Rocks, not only postcard angles
Where the Lesson Begins in Kirribilli (41 Broughton St)

Your session starts and ends back at 41 Broughton St, Kirribilli NSW 2061. That’s helpful because you don’t need to worry about complicated logistics after you finish shooting. It also puts you close enough to the action that you can focus on the camera work, not the map.
I like how the day-to-night flow supports a beginner-friendly rhythm: you start with foundations, then you immediately apply them to what you’re seeing. You’ll also be with a professional photographer guide and a local guide, so you get both technical instruction and place-based tips (where to stand, how to frame, and what to watch for as lights change).
One more practical point: this is near public transportation. If you’re planning to pair the lesson with other Sydney time, it’s easier to stitch into your schedule without a huge commute.
You can also read our reviews of more private tours in Sydney
Milsons Point to Luna Park: Training Your Eye Before the Night Wins
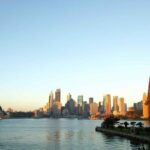
The first stops (Milsons Point, then McMahons Point, then Luna Park) are a smart warm-up. You get skyline and harbour angles early, while the light still has a bit of momentum. That’s the perfect moment to practice framing, because you can see how composition choices behave before it gets fully dark.
At Milsons Point and McMahons Point, you’re in position to shoot the harbour area with the bridge and waterfront as natural guides. This is where I’d expect your guide to push two fundamentals:
- What to include so the scene reads quickly
- What not to include so your image doesn’t turn into a confusing pile of lights
Then comes Luna Park. Shooting there is useful because it’s not just one landmark—it’s the kind of place with edges, signage, and lots of bright points. Those bright points are great for learning exposure control. You can compare how your image changes as you adjust shutter speed, ISO, or aperture, and you’ll see why night photography isn’t only about adding darkness—it’s about managing brightness.
A useful skill you’ll likely pick up here is how to aim your shot so people can understand it at a glance. That means thinking about foreground, leading lines, and where your viewer’s eye should land first.
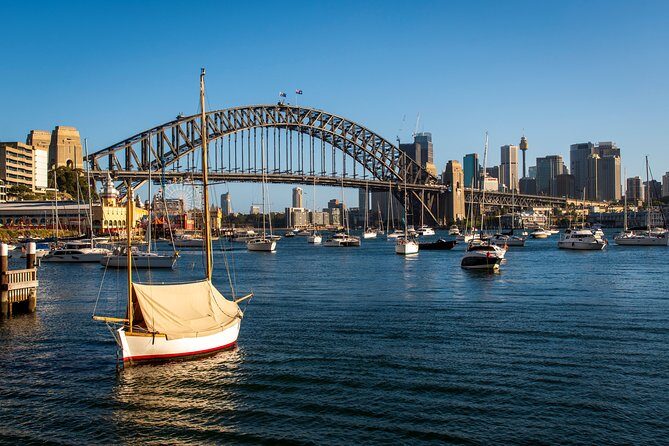
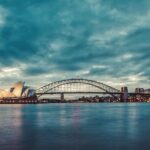
The Harbour Bridge and Hickson Road Reserve: Getting Exposure to Behave
Once you move toward the Sydney Harbour Bridge and Hickson Road Reserve, the lesson shifts into the part that most people struggle with: night exposure. The harbour area is full of mixed light—dark water, bright signage, and strong highlights—so your camera can easily overcook the bright spots or leave everything too muddy.
This is where the session’s structure starts to make sense. You’ll cover the technical basics behind better night shots, including:
- Aperture, ISO, and shutter speed (the exposure triangle)
- How framing choices interact with those settings
- How to make tradeoffs in real situations
From the feedback I’ve seen from past sessions, the guide (Glenn, in one shared experience) focuses on real-world examples of those tradeoffs. That matters. Instead of memorizing numbers, you learn what happens when you change one setting and keep the others steady. You should walk away with a clearer sense of what you’re doing in manual mode—especially why some shots look sharp but too bright, or why some look properly exposed but smear with motion.
If you’re used to letting your camera guess, this part can feel like switching from autopilot to actually driving. It’s a short adjustment, but it’s the difference between random results and repeatable ones.
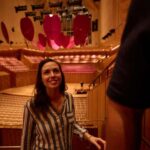
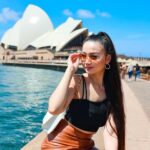
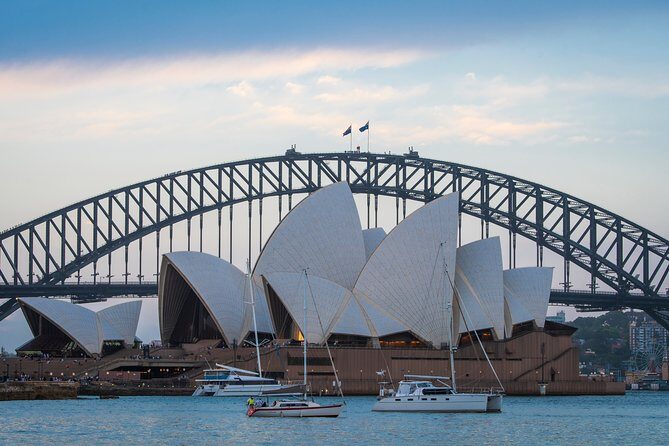
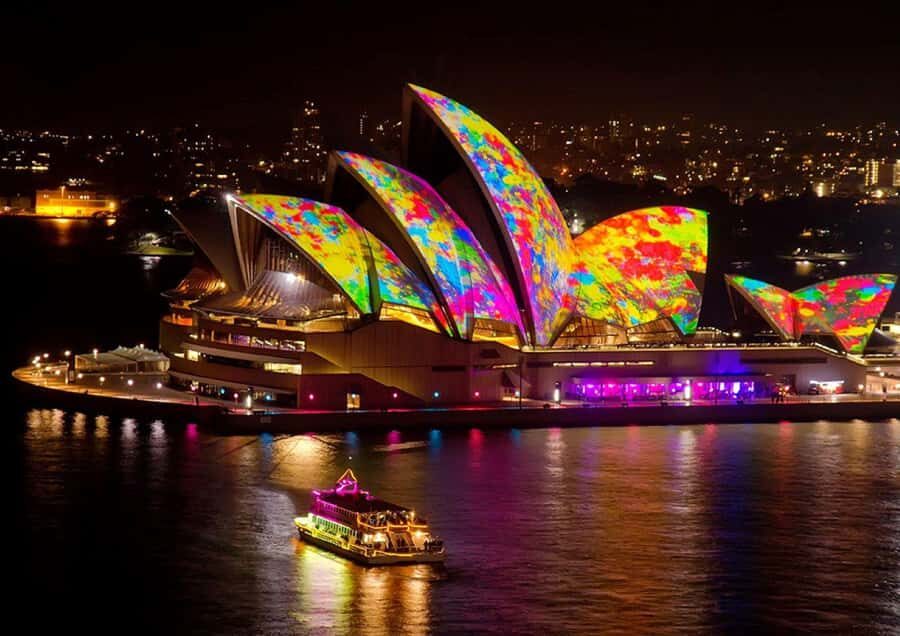
Sydney Opera House: Night Settings and Focus in the Real World
At Sydney Opera House, you get the kind of scene that can turn either gorgeous or frustrating depending on your settings. The Opera House has strong architectural lines and a big lighting presence, which gives you plenty of visual structure for composition.
This stop is valuable for two reasons:
First, it’s a classic subject that forces you to handle night contrast. You’ll be practicing how to control brightness so the building holds detail instead of blowing out highlights.
Second, it’s a great place to practice focus and patience. Night shooting often tempts you to rush. But when you’re learning, slow down. Small changes in your position can transform a shot, and your guide’s job is to help you stand in the right place to get the shot you want.
If you want one practical takeaway from this part of the evening, it’s that your composition and your camera settings aren’t separate problems. Your framing choices affect how your exposure behaves—especially around bright edges and high-contrast water reflections.
Cahill Expressway to Mrs Macquarie’s Chair: Timing the Twinkle
Next up are Cahill Expressway and Mrs Macquarie’s Chair. These areas are great for “right place at the right time” learning, because the light changes quickly once you’re into full evening. As things get darker, lights start to pop and the water and sky tone shift. That means the same camera settings don’t always give the same look ten minutes later.
This is also a strong area to practice the kind of night technique that keeps images from looking flat. A common pattern is:
- Slower shutter speeds can enhance the feel of water and lights
- Higher ISO can brighten a scene, but can also soften detail
- Aperture choices balance depth of field with how your highlights behave
Your guide will help you apply these ideas to what you’re actually shooting, rather than just talking theory. One helpful element from the earlier lesson feedback is that the coaching can be aimed at different experience levels in the same group. That means you can still follow along even if you’re not ready to control everything yet.
Mrs Macquarie’s Chair is particularly helpful for learning composition because it gives you a clear viewpoint. Even if you’re just starting, it encourages you to think about the relationship between architecture and water, not only the landmark by itself.
You can also read our reviews of more photography tours in Sydney

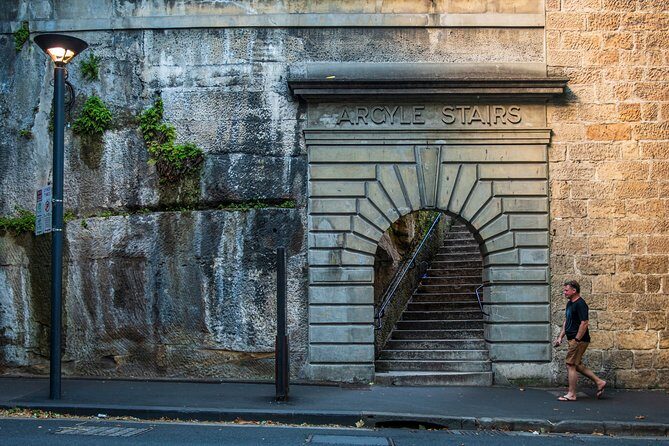
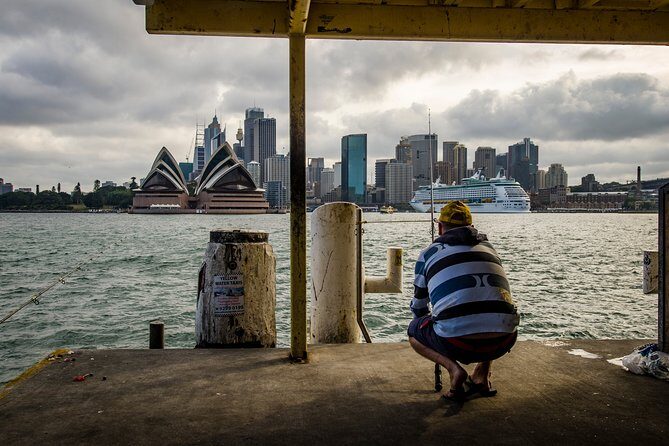
The Rocks Backstreets to Circular Quay: Turning Details into Strong Images

Then you head toward The Rocks and Circular Quay. This is where the session becomes more than postcard photography. You get the chance to shoot textured streets and the smaller visual stories that make night city photos feel lived-in.
The Rocks is a smart counterbalance to the big iconic landmarks. You’ll be practicing how to find detail shots—faces of buildings, stone textures, signage, and tight compositions that tell a story even when the scene isn’t perfectly symmetrical. This matters because many people come home with only landmark photos. A few strong backstreet images can make your set feel like a real night out, not a tourist checklist.
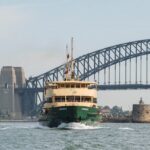
Circular Quay is the finish line, and it’s a place where night works especially well. You can frame the waterfront with reflections and the glow of city lights. And the tour concept includes moving along by ferry to get you into good angles at the right time, rather than relying only on one fixed viewpoint.
If you take one mindset from this part of the evening, take this: night photography is often about layers. Bright points, dark space, moving water, and architectural lines all compete. Your job is to decide what leads the image and what supports it.
What You Learn (and Why It Cuts Through Guesswork)
Over the full three hours, you’ll go over a structured set of skills, but it’s not “lecture then leave.” The whole point is to practice on location.
Here’s what you should expect to cover:
- Understanding your camera with the exposure triangle: aperture, ISO, shutter speed
- Framing the perfect image: what to include, and what to skip
- Night photography techniques: what settings and locations tend to work best
- Standing in the right place at the right time for the shot you want
- Reviewing your photography so you leave with clear next steps
The review portion is one of the most valuable parts. Lots of workshops teach you how to shoot, then they stop. Here, you get feedback on what you captured and why it works or doesn’t. That’s how your progress speeds up—because you fix the most important mistake first, not the easiest one.
One especially praised element from past sessions is how the guide (Glenn, in shared feedback) can handle different abilities in the same group. If you’re newer, you get help building control. If you already know manual exposure, you still get useful tradeoff guidance and composition refinement.
Price and Value: Is $186.48 a Good Deal?
The price is $186.48 per person for a private session, lasting about three hours. That sounds like a lot until you compare what you’re actually buying.
You’re getting:
- A professional photographer guide
- A local guide
- Photography tuition and review
- Shooting across multiple high-value Sydney locations at night
- A private group size of up to four people
The value gets stronger if you’re going with one or two people, because group discounts are available. Even if you’re solo, the private format matters. You’re not competing for attention with a crowd. You’re learning through coaching in real time.
Also, the session is popular enough that it’s typically booked around 49 days in advance. That’s a hint that you shouldn’t wait until the last minute if your trip days are fixed.
If your goal is to come home with a set of photos you feel proud of—plus skills you can use later—this pricing can make sense. If you only want to take photos and don’t care about learning, you might feel it’s pricier than a self-guided night walk. But if you want real instruction tied to real scenes, it’s a solid way to spend a few hours in Sydney.
Practical Prep: Camera, Tripod, and Comfort at Night
A few things to plan for so you can focus on shooting:
- Camera is not included. Bring your own.
- Tripod is not included, but tripod rental is available if you want it.
- Wear shoes that handle uneven sidewalks and night walking, because this route covers a lot of ground.
- If you’re learning night techniques, consider how you’ll stabilize your shots. A tripod can help with long exposures, but handheld approaches can work too depending on what your guide is helping you practice.
Near the end, when you’re likely working around Circular Quay and the Rocks, you’ll want to be ready to adapt quickly. That’s when your guide’s advice on timing and placement really pays off.
Who This Photo Masterclass Fits Best
This session is a great match if you:
- Want to learn manual exposure basics without getting lost
- Love the idea of shooting Sydney’s icons but want more than obvious angles
- Prefer hands-on feedback instead of vague tips
- Are comfortable walking between several spots over a short window
It’s also a good choice if your group has mixed experience levels. The lesson format is set up to support different abilities rather than treating everyone the same.
If you hate standing still and you like shooting with a plan, you’ll probably enjoy this. If you want a slow, museum-style pace, you may find it too active for your taste.
Should You Book It?
Book this if you want a night in Sydney with guidance that actually changes how you shoot. The blend of iconic landmarks—Milsons Point, Luna Park, Harbour Bridge, Opera House—and the more textured scenes in The Rocks gives your camera skills a range of challenges. Add in photo review, and you’re far more likely to leave with clearer settings and stronger compositions.
I’d skip it if you’re only looking for casual snapshots and you don’t want to touch the exposure triangle or composition choices. For learning, though, this is exactly the kind of tight coaching session that turns frustration into control.
FAQ
How long is the Sydney Photography Masterclass?
It’s about 3 hours.
Is this a private lesson?
Yes. It’s private for your group, with up to four people total.
What’s included in the price?
You get a professional photographer guide, a local guide, and photography tuition plus a review. A camera and tripod are not included.
Do I need to bring my own camera or can I rent one?
The camera is not included. Tripods are available to rent.
Where do we meet for the lesson?
Meet at 41 Broughton St, Kirribilli NSW 2061. The activity ends back at the meeting point.
Can I cancel and get a refund?
Free cancellation is available. You can cancel up to 24 hours in advance for a full refund. If you cancel less than 24 hours before the start time, the amount paid is not refunded.
You Might Also Enjoy
More Photography Tours in Sydney
More Private Tours in Sydney
More Tour Reviews in Sydney
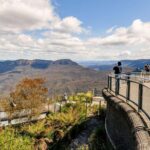
- Blue Mountains Small-Group Tour from Sydney with Scenic World,Sydney Zoo & Ferry
★ 5.0 · 3,709 reviews